Weapon Loadout and Customization
Documentation for the Weapon Loadout and Customization system
Introduction
This is the documentation for the Weapon Loadout and Customization available on the UE4 Marketplace.
Changelog and future Updates
- 1.0 Release
Getting Started
Folder structure
The asset comes with two folders. The folder WeaponCustomization contains the core functionality. The folder FirstPersonExample contains the default UE4 First Person Template to showcase how to integrate the System into your project. If you don’t require this example, you can simply delete this folder.
Inside the WeaponCustomization folder there are several important sub-folders:
| Folder | Description |
|---|---|
| Blueprints | Files for the core functionality |
| DataAssets | Contains all the DataAssets for Weapons and Weapon Attachments |
| UI | Contains all the UMG widgets that are used |
| WeaponAssets | Contains all the assets (meshes, textures, materials) |
Adding new attachments
New attachments can be added by simply creating a new DataAsset or copying an existing DataAssets and modifying it. For demonstration purposes, we create a new sight attachment:
- Create a copy of the
DA_AimpointSightDataAsset located within theWeaponCustomization/DataAssets/Attachmentsfolder and open it - Assign the new static mesh and make sure to update all the information like Name, Descriptions, and Pros & Cons

As a final step, the new attachment needs to be added to the weapon. It needs to be every weapon individually. We are adding a new sight to the M4:
- Open the
DA_M4DataAsset within theWeaponCustomization/DataAssets/Weaponsfolder - Add a new entry to the
Available Attachmentsvariable and select the newly created DataAsset
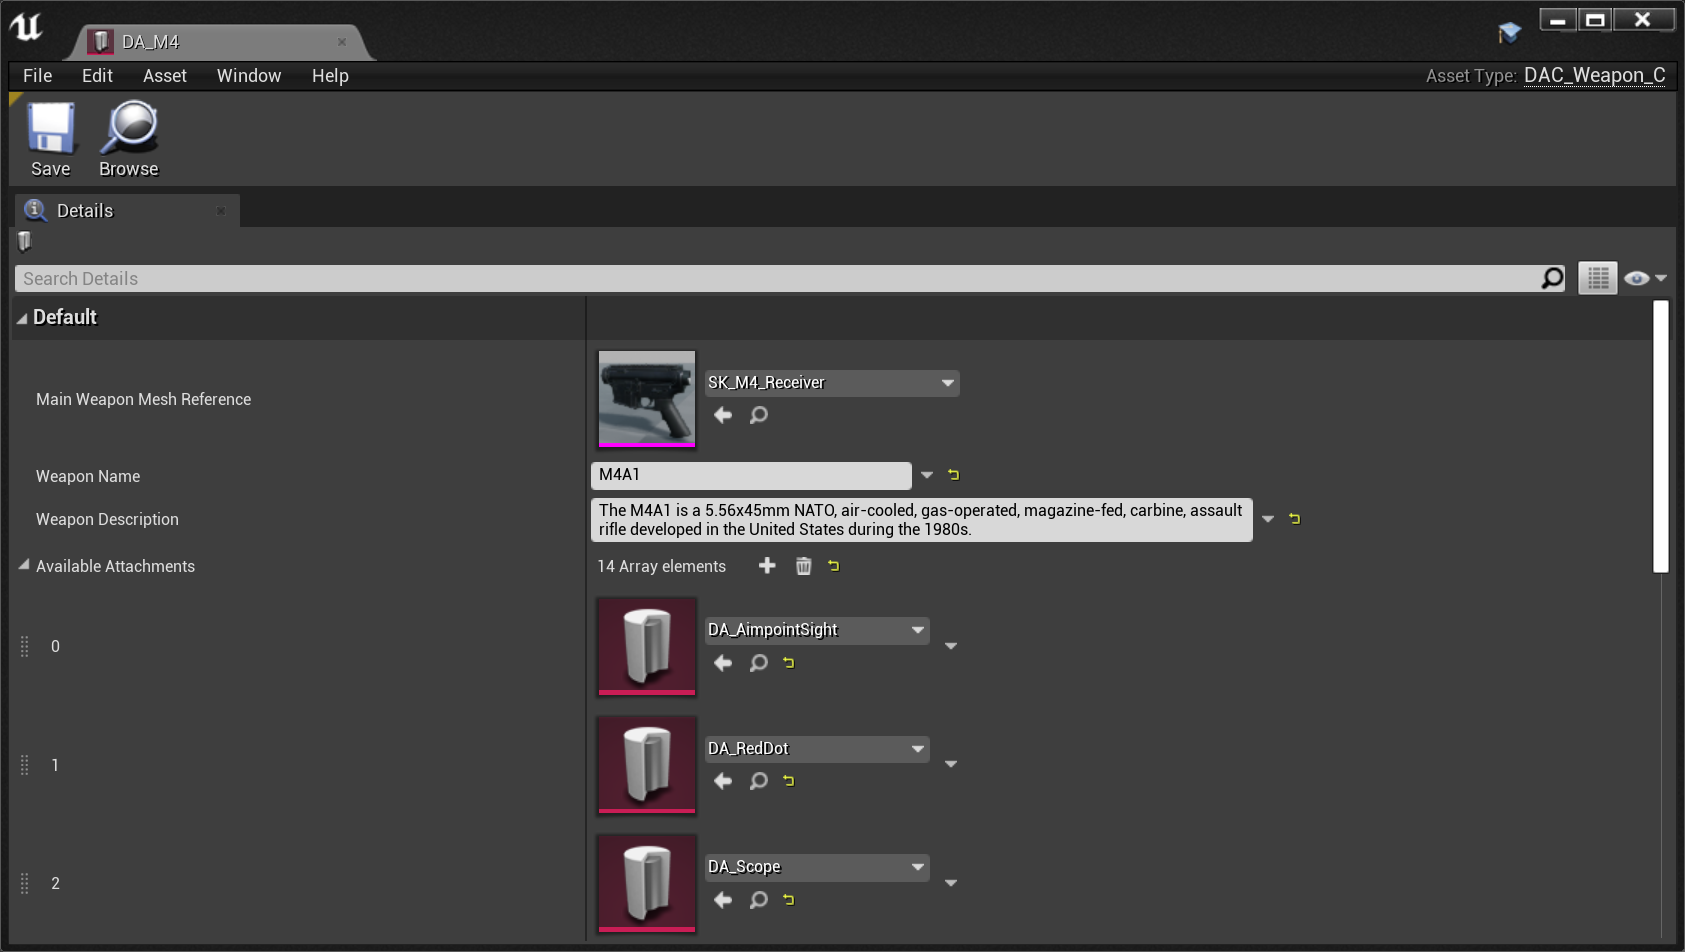
Important: We are done now at this point. The UI will update automatically. Adding the new DataAsset is all that is required.
Adding new weapons
Adding a new weapon works similarly to adding new attachments. When adding a new gun, you’ll most likely need to add new attachments. The process of adding a new new weapon will be explained by using the M4 as an example.
First of all, we need to add the base mesh for the weapon. In the case of the M4, this is just the receiver of the weapon, everything else is added as attachments:

Of course, we could add more of the gun, but that would limit us in the amount of different attachments we can use. E.g. if they do not want to change the barrel on the gun, we can directly import that along with the receiver. The mesh needs to be imported as a skeletal mesh, with the root bone sitting at 0,0,0. After importing, open up the Skeletal Mesh asset and add all the necessary sockets:
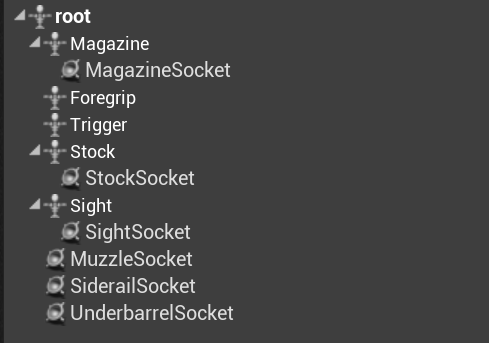
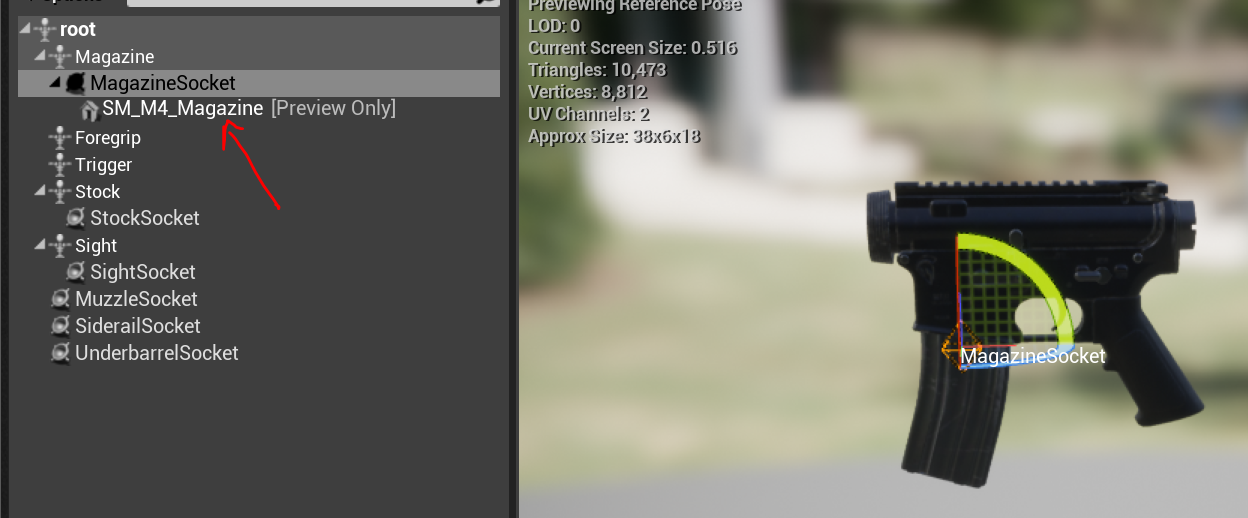
If you do not plan to use a specific slot (e.g. you don’t want to use the Underbarrel Slot), you don’t have to add that socket. You can test your sockets by adding preview assets. In the following example we added the magazine mesh for testing:
Next, we can add a new DataAsset for the weapon. Create a copy of DA_M4 inside the /WeaponCustomization/DataAssets/Weapons/ folder and rename it to suit the new weapon you are adding. Open it up and select the newly imported Skeletal Mesh. Delete all entries within the Available Attachments array, since we will be re-adding attachments later on. Fill out the remaining data like description etc.
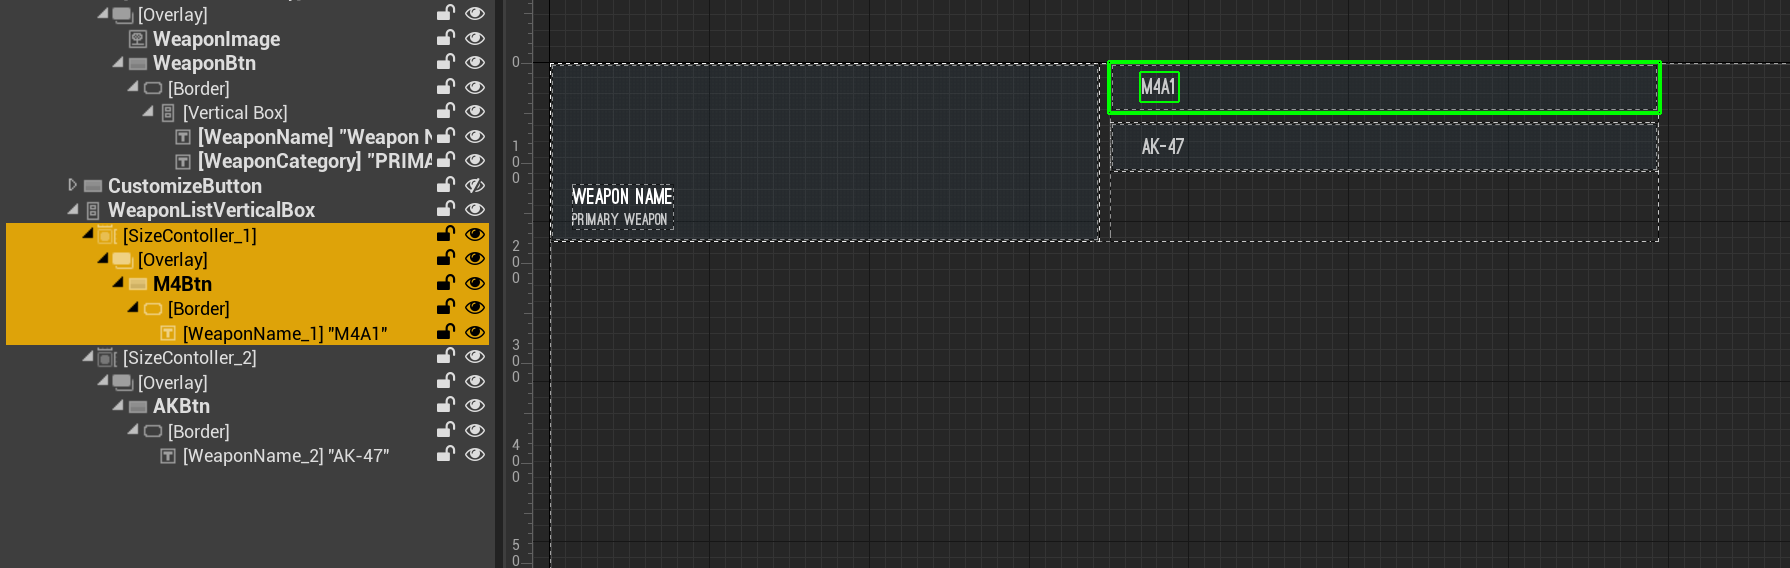
Attachments are automatically added to the UI, new Weapons are currently not. However, this will change in the next update. For now, they will need to be added manually. To do that, open up the widget WBP_WC_WeaponSelectionButton within the folder WeaponCustomization/UI/Widgets/. Create a copy of the widgets marked in yellow and add it to the WeaponListVerticalBox:
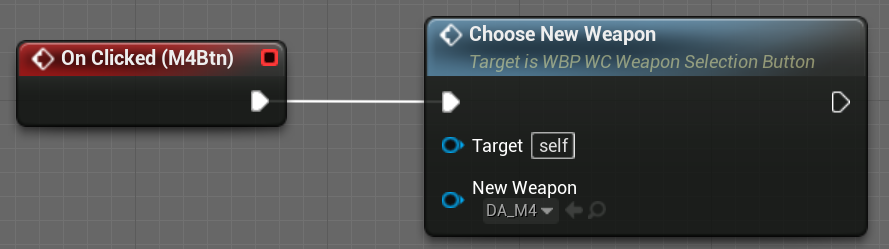
Select the newly created button widget and add an OnClicked event. This OnClicked needs to call ChooseNewWeapon, with the newly created Weapon DataAsset as an input:
That’s it. The new weapon is now functional and shows up in the UI. As a last step, we can now add all the necessary attachments (see the section above about “Adding new attachments”).
Integration into another Project - General Notes
The integration into another project is kept simple. For a basic integration, only one component needs to be added to the existing weapon or character class. In this example, we will integrate the system into the default UE4 First Person Template. This is already done in the project itself, so feel free to check out the implementation yourself. Depending on the project you want to integrate this with, the steps will slightly differ. If your project has a dedicated weapon Blueprint we advise implementing the component there.
Integration into another Project (UE5 version)
The UE5 First Person template has a dedicated Blueprint for the weapon called BP_Pickup_Rifle. We will NOT be using this Blueprint for the implementation, but rather attach the weapon directly to the character first person hands. Open up the BP_FirstPersonCharacter BP and add a BP_WeaponComponent to it.
Select GripPoint as the parent socket. Since the rotation for that socket differs from what is being used by the weapon component, the rotation needs to be set to 0,0,-90:
Lastly, the default value for the existing variable bHasRifle has to be set to true, so that the AnimBP being used in the template updates accordingly and shows the correct pose for holding the weapon.
As an optional step, you can edit the transform of the FirstPersonMesh to get a better view of the weapon:
As a result the weapon now shows when playing:
Integration into another Project (UE4 version)
The UE4 First Person Template doesn’t have a dedicated weapon Blueprint but rather puts the weapon mesh directly onto the player character. So first open the FirstPersonCharacter Blueprint. Add the BP_WeaponComponent and make it a child of the existing FP_Gun component:

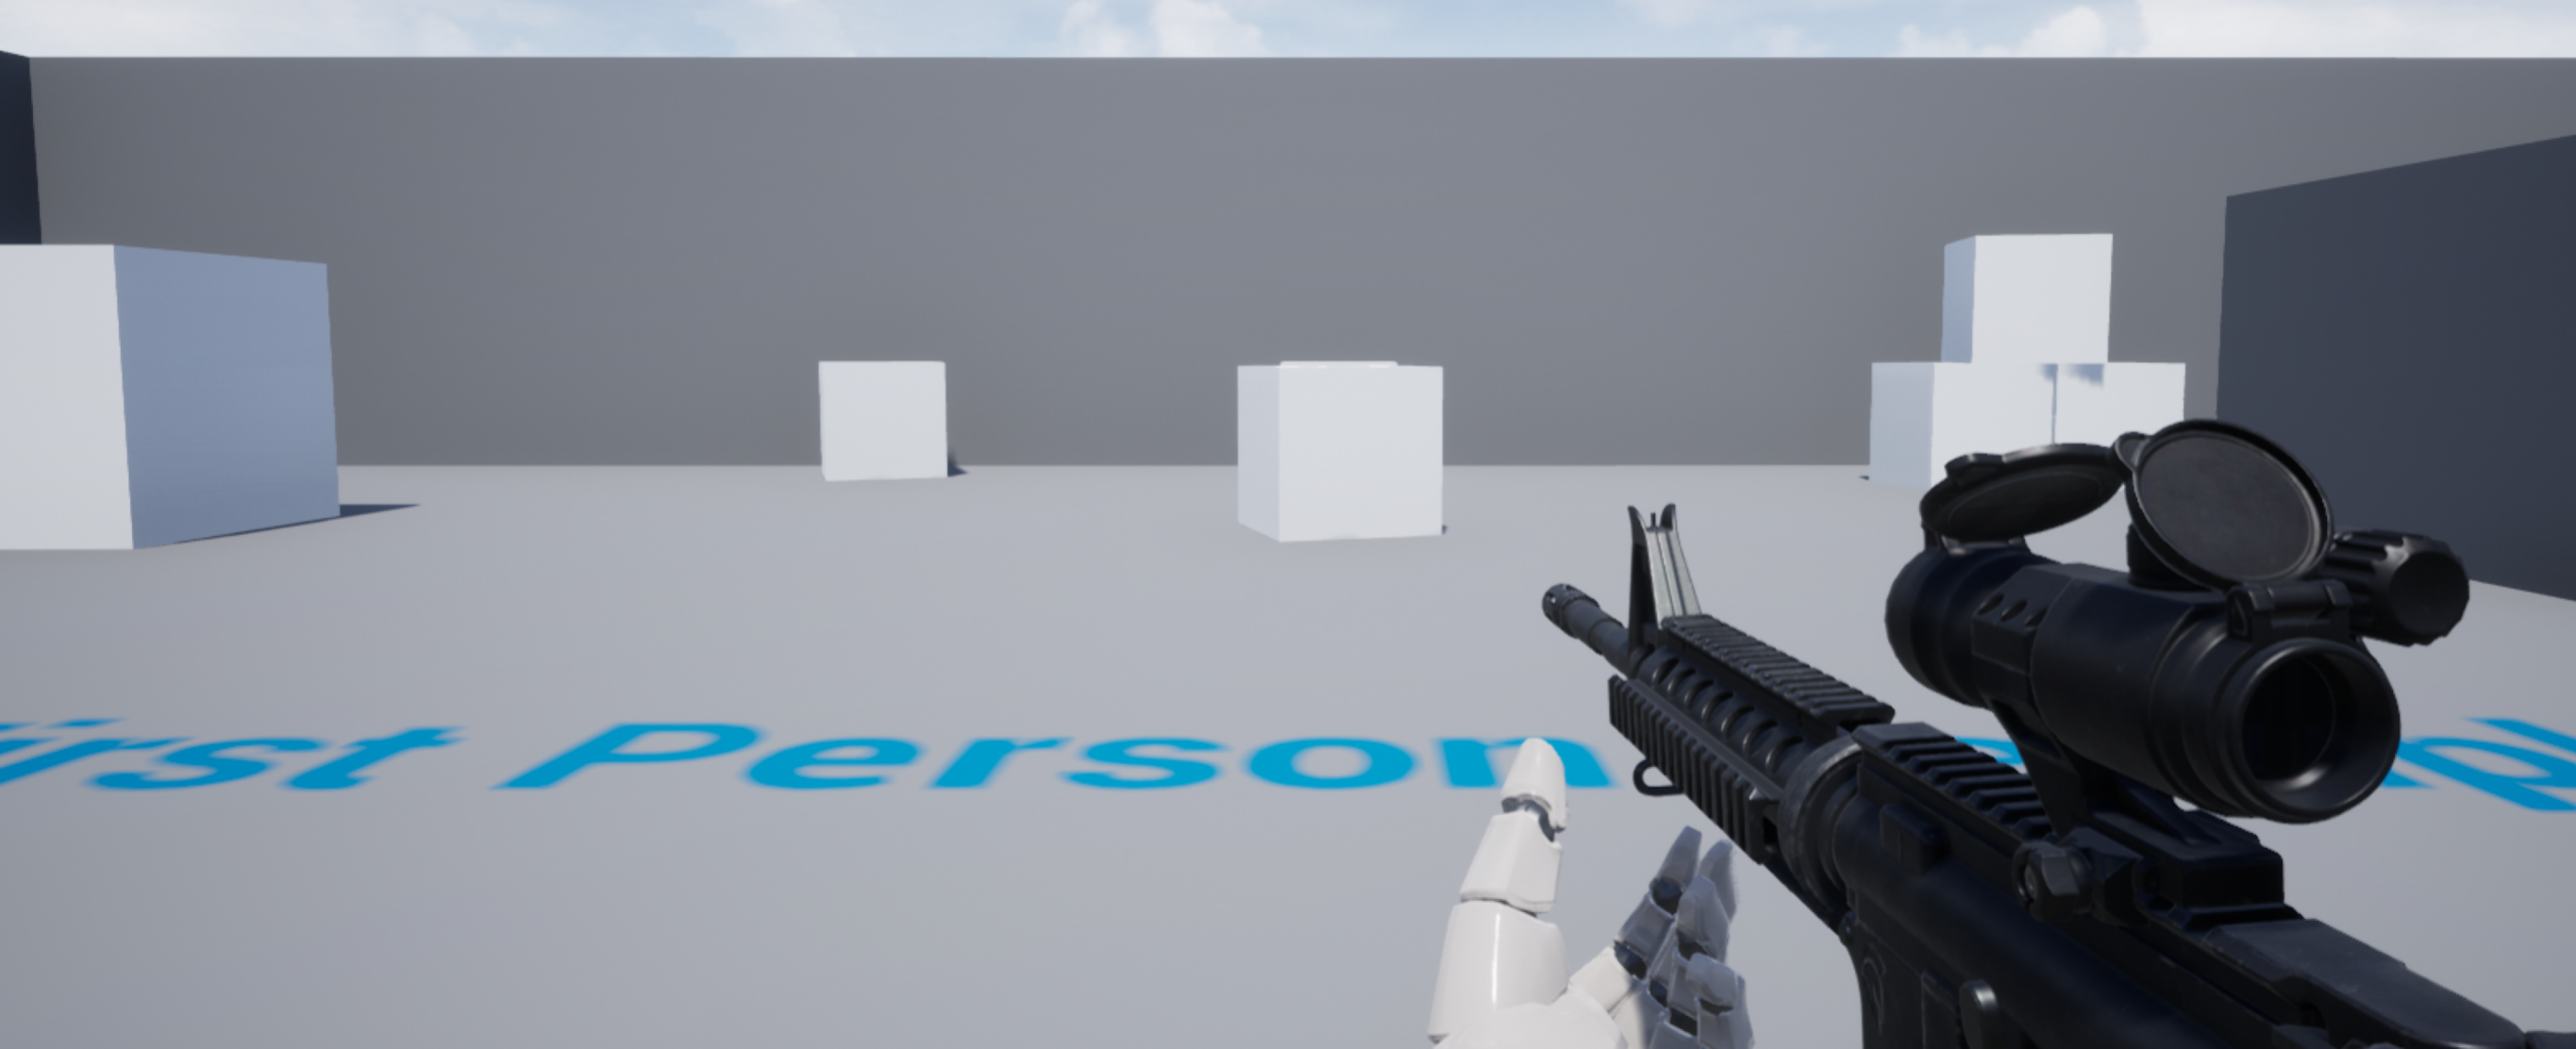
Select the FP_Gun component and within the Details panel set Visible to false so that the original weapon does not show in-game. You can adjust the position of the Mesh1P component to better fit the weapon. Press Play and the last selected weapon, including all the attachments will now show up:
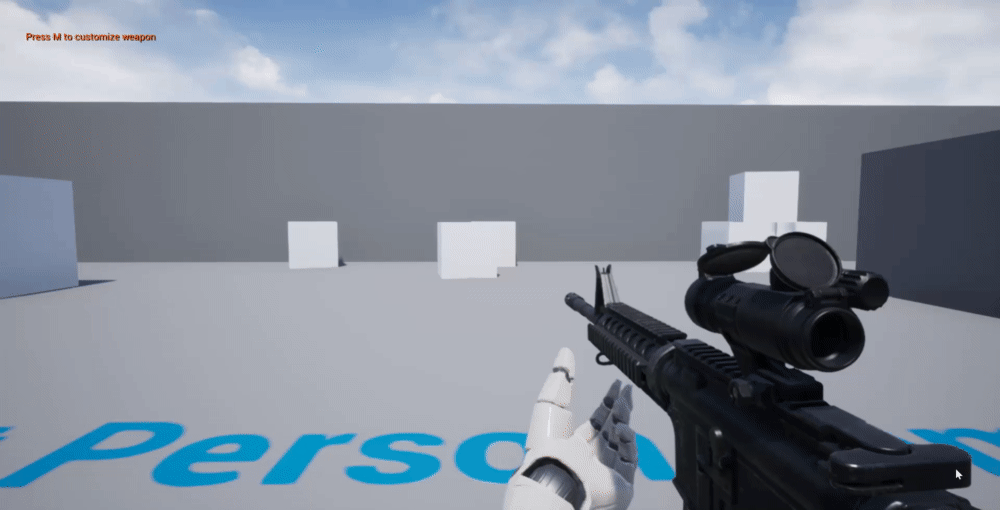
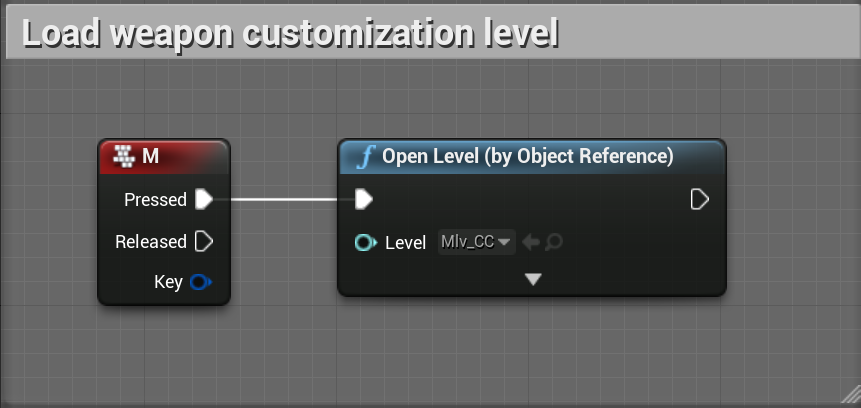
The project has already implemented a First Person example. Additionally, it allows easily customizing the weapon by returning to the main menu by pressing the M key:
This implementation is done by loading the main level:
Questions?
For any further questions join the Discord server or write us an email: support [at] cb-productions.de